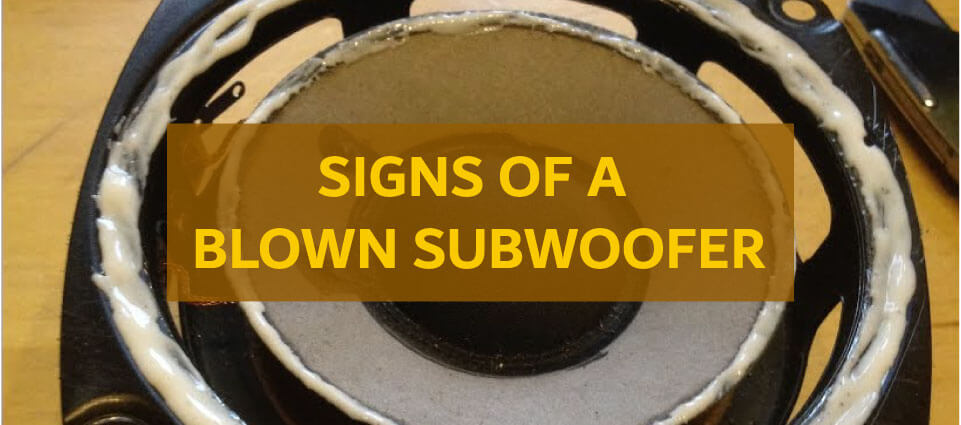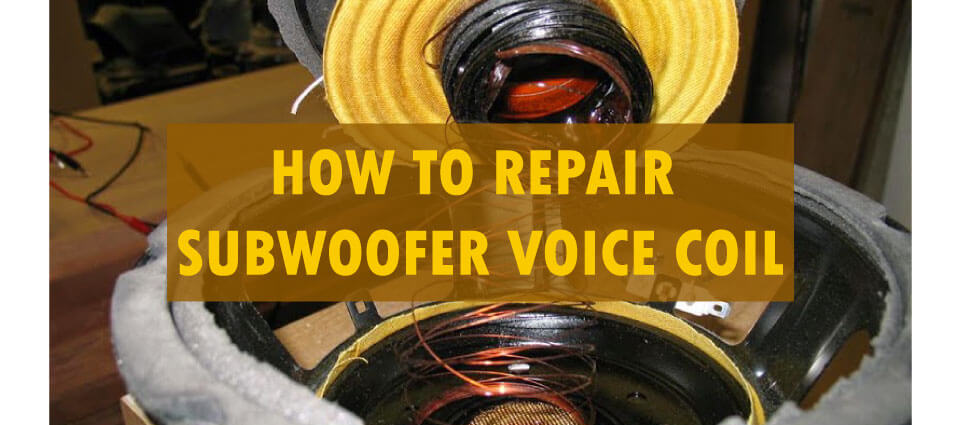
Subwoofer Voice coil repair
Many people enjoy loud music. They damaged their subwoofer because loud music requires more power. If you overpower the coil, you will usually damage it. When the voice coil is damaged, The subwoofer does not produce sound, or you hear the sound, but with distortion.
Voice coils differ between different subwoofers. Sometimes you can buy voice coils from the market, but sometimes you can’t. Today, we will discuss how to repair subwoofer voice coil by hand. We demonstrate a step-by-step guide on How to fix a blown subwoofers‘ voice coils in the following guide. Let’s get straight into it.
Required Equipment
- Insulated copper wire
- Toluene
- Yellow Contact Adhesive
- Slow-drying epoxy resin
- Scissor
- Masking Tape
- Thin wooden sticks
- X-ray’s plastic film
- A clean cloth
- A piece of aluminum foil
- Kraft paper
- Tip spear scalpel
- Heat Gun
- Mold with the same diameter as your voice coil.
- Winding Machine
Steps to Follow
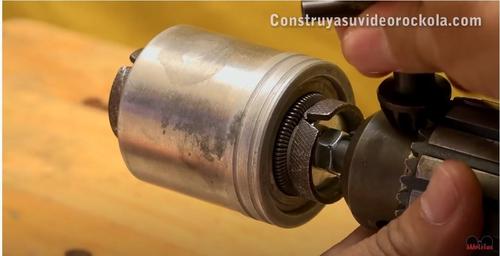
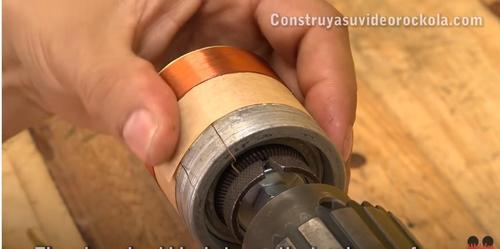
Step 1: It is first necessary to position the mold in the winding machine and tightly tighten it.
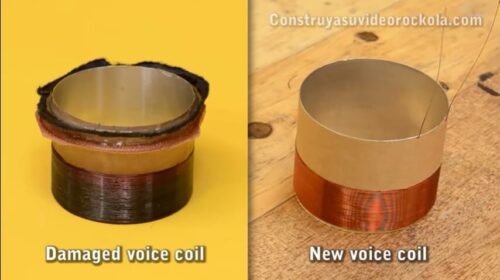
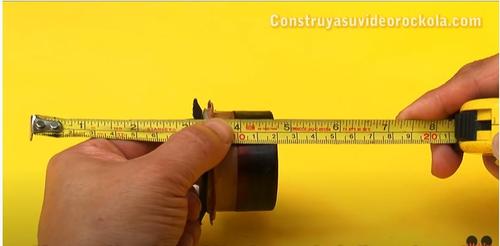
Step 2: Measure the width of the damaged voice coil.
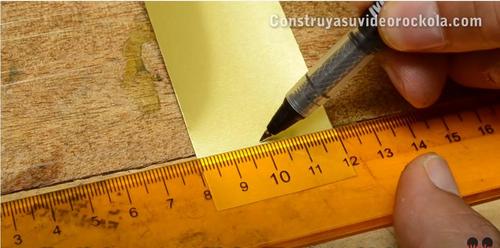
Step 3: You should measure the aluminum strip face over with a tolerance of 2 millimeters.
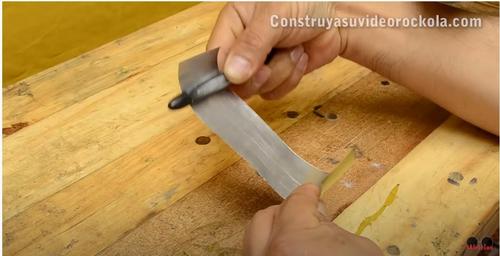
Step 4: Using a pencil or screwdriver, bend the aluminum strip. You must face the silver side inward when you make your ring.
Step 5: Once the mold has been placed, the aluminum strip is wrapped around it and taped down. After the mold is placed, Wrap the aluminum strip around it and tape it down.
Step 6: On the bottom of the aluminum, place both x-ray strips. Strips of X-ray paper make it easier to remove the aluminum from the mold.
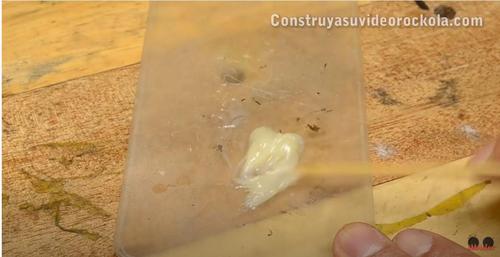
Step 7: Now paper the epoxy resin. You need to use equal parts and mix them well with thin wooden sticks. It is also a good idea to add epoxy solvent if you will not be using toluene. Remix it again if necessary.
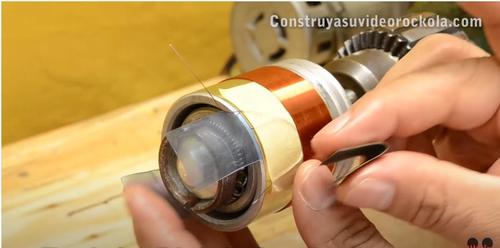
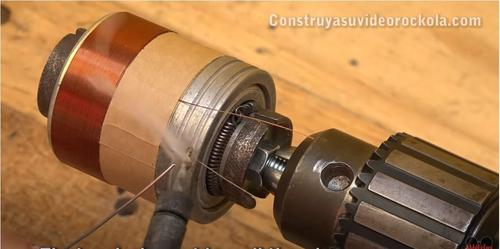
Step 8: As soon as you reach the top of the masking tape, pull down the copper wire.

Step 9: We apply epoxy resin over the entire top of the aluminum when we roll up the wire.

Step 10: After you’ve wound the wire, it’s time to crimp it. Make sure that the first turnaround finishes at the wire’s beginning point. The machine should be started after the first turn is completed, and the wire turns should be rolled up without leaving any space between them and without that turn mounted on another turn. It should be perfect winding.
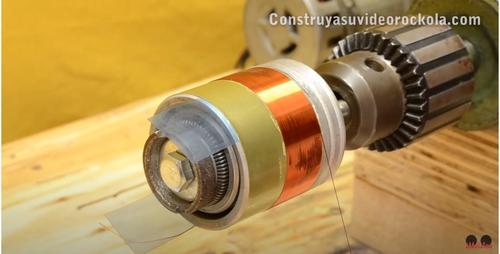
Step 11: Apply the epoxy resin over the copper winding after you roll up the first winding wire layer.
Step 12: Once the epoxy resin is applied over the copper winding, turn the wire over the first layer of winding again. Remember to wind the second layer wire the same way we wound the first layer wire. With masking tape, we secured the second layer and with a wire cutter, we cut the same length wire as the starting wire with the help of a cutter or scissors.
Step 13: You can now leave it to dry for 24 hours or you can use a heat gun to dry it. Remove the bubbles with a cloth as wire and resin are heated with the heat gun.
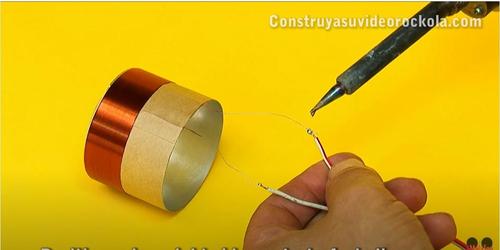
Step 14: Must remove varnish from wire ends with a lighter.
Step 15: Sanded the wire with sandpaper now.
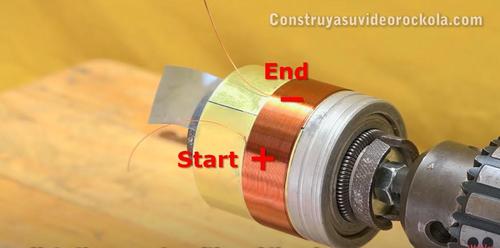
Step 16: The beginning wire is the positive and the end wire is the negative.
Step 17: Now you can also check the positive and negative through a digital voltmeter.

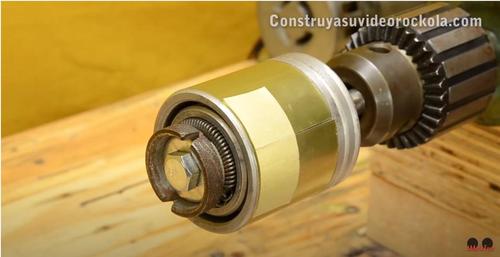
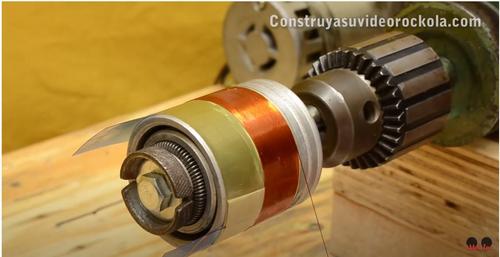
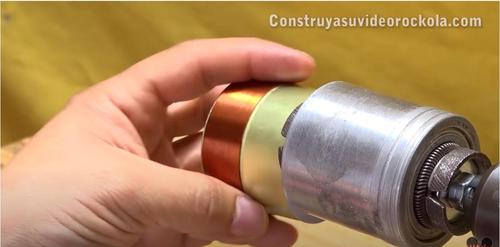
Step 18: Remove the x-ray strips from the bottom of the aluminum strips now. Now we need to remove the voice coil very carefully from the mold.
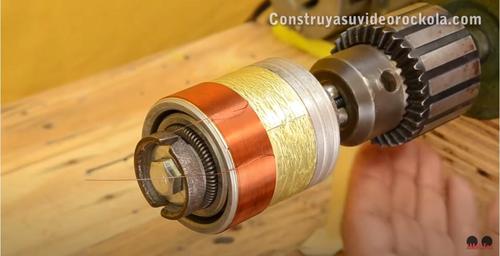
Step 19: Measure the width of the voice coil collar now.

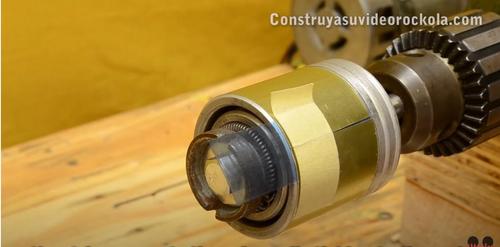
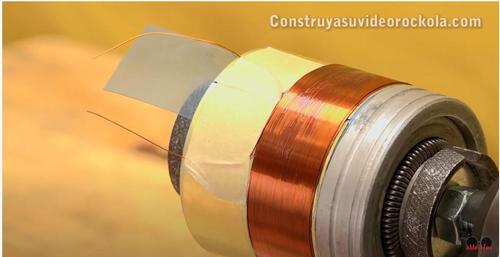
Step 20: Now we apply the yellow adhesive contact across the surface of the voice coil collar and dry it for a while.
Step 21: Also apply the yellow adhesive contact on kraft paper. After the glue has dried, we place the kraft paper on the collar of the voice coil. After going around we put the wires over the paper. Apply some yellow adhesive contact on the wire and place the kraft paper and let it dry. Also, make sure that they are isolated.
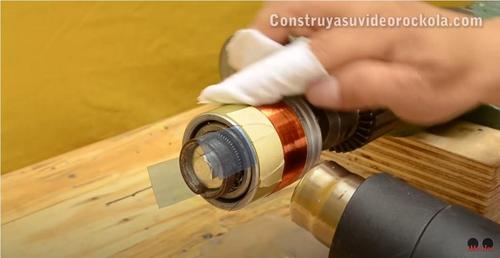
Step 22: Then use a cloth moistened with toluene to clean the remaining glue.

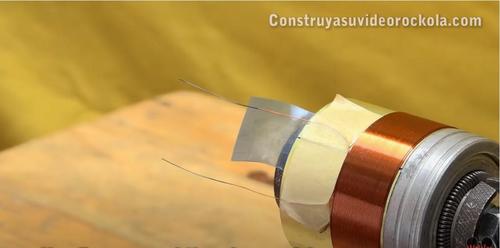
Step 23: Now apply the solder paste to the end of the coil wire and weld them.
Step 24: You need to make sure that the voice coil is matching the speaker.

Step 25: Now you need to connect the positive wire to positive and the negative to negative. (stating of winding is positive and ending of winding is negative)
Step 26: If you want to check that the wires you connect are right then use a battery or cell and connect positive to positive end and negative to negative end. If the voice coil moves upward then you connect the right wires.
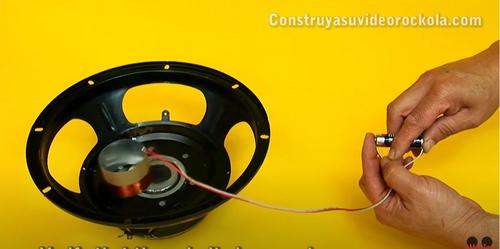
Step 27: Now your voice coil is ready, and you can replace the voice coil.
Step 28: Reassemble and Fix Other Parts as you remove them.
Enjoy your music and subwoofer now. If you still have trouble following these steps on how to repair a subwoofer voice coil or if you don’t understand them, you might find this video useful.
Hi, this is Ali. I have been an enthusiast of speakers especially subwoofers. So, I am finally going to throw my experience out for you guys.